
Hello Dear Friend,
What an excellent tutorial I have for you today. It’s the final reveal of the Picnicing Quilt Carrier I created for the ever-loving quilt makers that want just a bit more ease while toting around those quilts we are all so proud of.

I love my quilts! I’m incredibly proud of all my handmades! What I don’t like is carrying them on the go. They flop around in my arms, come undone, drag along and in many occasions have tumbled straight onto the dirt. It’s happened to you too, I’m sure.

For this reason I know every quilter, or parent for that matter needs to make one of my Picnicing Quilt Carriers. You will thank me, and wonder just as I have why this wasn’t done sooner. 😉

Here’s the list of materials:
(2) 14″ x 10″ Fabric
(4) 32″ x 1.5″ Fabric
(1) 14″ x 10″ Flex 1-Sided Fusible Foam Stabilizer
(2) 32″ x 1.5″ Cotton Batting
(1) Adjustable Shoulder Bag Strap with Tabs
(2) 1″ Metal Swivel Hooks
(2) 1″ Metal “D” Rings
(2) 1″ Metal Slide Buckles
Sewing, Quilting & Heavy Duty Upholstery Thread
Here are a few of the materials I used and their affiliate links:
Let’s get on with the show!
Pick your prettiest two coordinating prints for the main body of the quilt carrier. I used the new floral prints in Poppie Cotton’s latest line Goose Creek Garden called Wildflowers Red and Soft Breeze Pink. The deep red Wildflower fabric is so beautiful to me. It was also an unusual choice as I usually pick lighter and brighter floral fabrics. Since I’m the one that will be using this carrier, I opted for a more mature colored floral and so glad I did. The great thing about this carrier is you can use any type of material you’d like, such as canvas, vinyl, upholstery, faux fur, etc. and it would look good in all of them!

Cut them down to 14″ x 10″ each. Take the print you plan to use as the outer shell and iron it onto the foam stabilizer. It’s your choice to round the corner like I did or keep them squared. Here I used a two inch round to trace and cut out the corners.

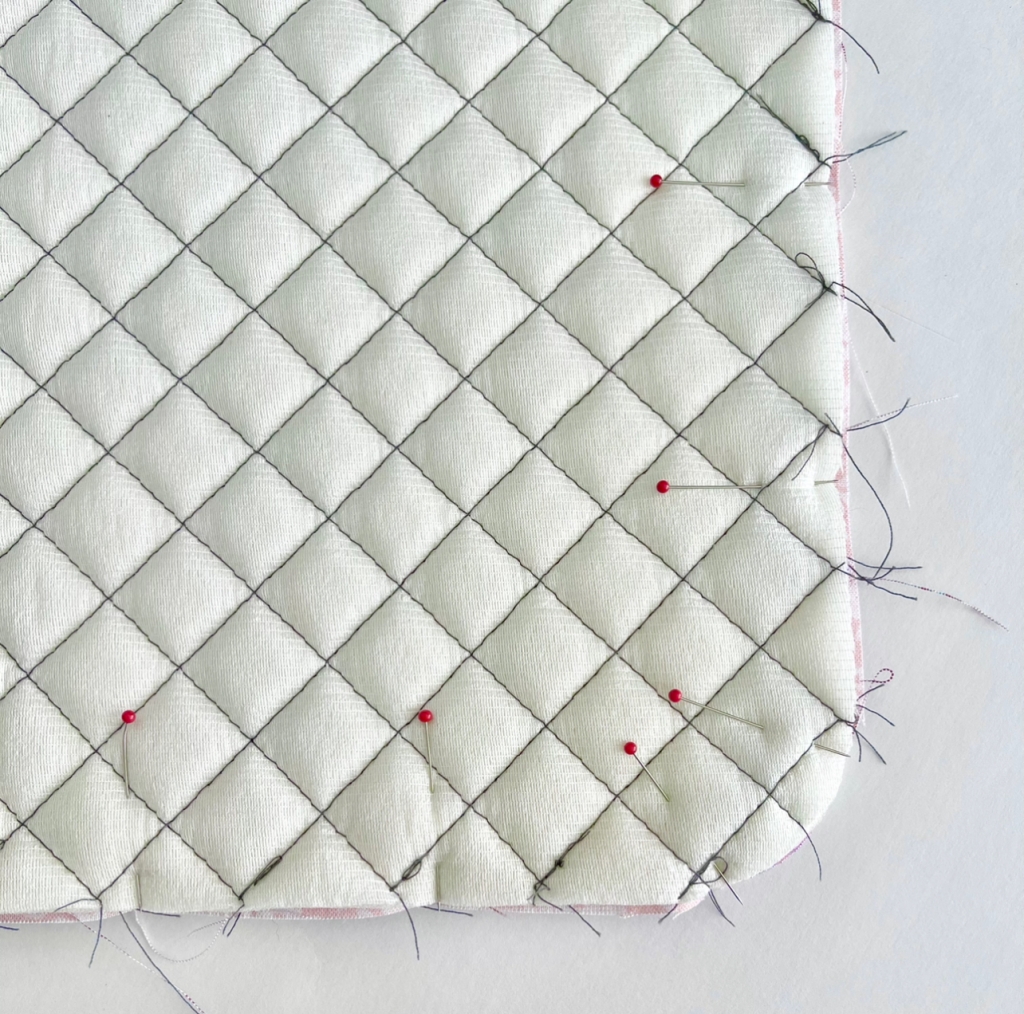
With just the top fabric and stabilizer fused together, quilt a fun design onto your quilt carrier base. I wish all quilting was this quick and easy. Haha!

Press the stitches then pin the bottom layer fabric on with right sides together. You will sew a 1/4″ seam around the entire piece leaving a two inch gap for turning.
Press, snip small v’s on the round corners, being careful not to cut through the thread seam. Turn inside out and press again. I like to soak my edges and iron a crisp edge, especially on the round corners. Take your time, this can make your carrier look sharp, or sad… 😦
Stitch an 1/8″ seam around the entire edge especially the open gap. Going around again, add another seam 1/4″ inside the previous one. Finishing with two seams looks oh so niiice!

Let’s make the adjustable carrying straps now. Here is the Country Confetti basic cotton I used also from Poppie Cotton in Weathered Wood. Friends, this color is a darker gray but not too cool toned, it’s versatile and I’ve already used it in multiple projects because I love it so.

The weathered wood gray also looked excellent next to my brass metals hardware, it was an obvious yes! Take two of your 32″ x 1.5″ fabric strips, line them up right sides together, add a strip of cotton batting of the same size to one side and pin. Repeat with the other two pieces and batting.

You can round the corners of one end on each strap if you would like, but I left mine squared. Sew a seam around the entire edge, leaving one end open on both straps. Turn them inside out and press crisp edges.

Now add a 1/8″ outer seam along all the sewn edges. The reason I sew such a small seam is because it’s easy to let my machine guide the fabric along the foot’s edge. You thought I had a good reason didn’t you? But I’m really just a lazy sewist. Ha!

Here’s where the real measurements come in. We’re going to attach the metal hardware and want it to look just right. Speaking of hardware, the set I ordered came with all that I needed metal swivel clasp, “D” ring and slide buckles all in a handy little box that is now holding my collection of metal accessories.

With the open end of the carrier straps, measure a 1/2″ mark and 1.5″ along the strap (see purple markings). Insert your “D” ring, fold the half marking up to the second line at 1.5″, pin as shown. Carefully sew two lines with a heavy duty thread to ensure it won’t come undone. Repeat with the second strap.

Along both 9″ ends of the quilted carrier measure and mark 1.5″ away from the edges as shown. You will pin the carrier straps on the inside of this marking leaving the “D” rings hanging off the front edge.

With a heavy duty thread, sew them together following the previously stitched line on the carrier straps, adding some extra seams on both ends to secure. So far so good? It should look like this.

No seams needed when attaching the slide buckles and clasp. Take the carrier straps in the back and weave them through the slide buckles, through the clasp ring and down into the buckle again. Now they should feel secure. If not you will have to get smaller buckles that hold a little tighter so the quilt straps don’t slide out.

It’s ok to stop and admire those adjustable straps. I was a bit proud of myself after that step too!
Final step is adding the purse strap to the top. There are so many options available. I chose to go with a dark brown leather strap to compliment my wildflower red fabric. While I love the look of the purse strap I used it’s a bit more stiff than I had hoped for.

Still it’s a beautiful finish especially with the petal shaped tabs. Very pretty! Measure the quilted carrier lengthwise and find the center line for tab placement. Depending on the tabs you have your step may look different than mine.

I knew with the tab’s leather finish, my sewing machine would have eaten right through and added stitch holes in the unmarked areas. So, I opted to hand sew them on with multiple pieces of heavy duty thread in a matching color that I sewed onto the outer material only.

In the pic you can see the stitches did not go through to the back. It’s a clean finish that I’m very happy with.

Do what you think will look best with your strap, because this last step finishes your carrier.

So, what do you think? Your very own Picnicing Quilt Carrier and it was much easier to make than expected. Once you have all your materials, this quilted accessory comes together in a short afternoon.

Will you make it again? Make one for a friend? I think it’s an automatic win for all the quilty friends in your life.

And it looks so pretty!
I keep admiring my quilted, feminine, modern Picnicing Quilt Carrier. It’s going to be on full display as I take it on family picnics and the current soccer season.

Let me know your thoughts in the comments, or on Instagram @linenbouquet. For a share use the #PicnicingQuiltCarrier I really want to see your designs and the adventures you take your quilts on.
with love, Jasmine

super cute! looks like a doable tutorial.
LikeLike
It most definitely is! I would love to see if you make one 🙂
LikeLike